Taking Measurements
Supplies
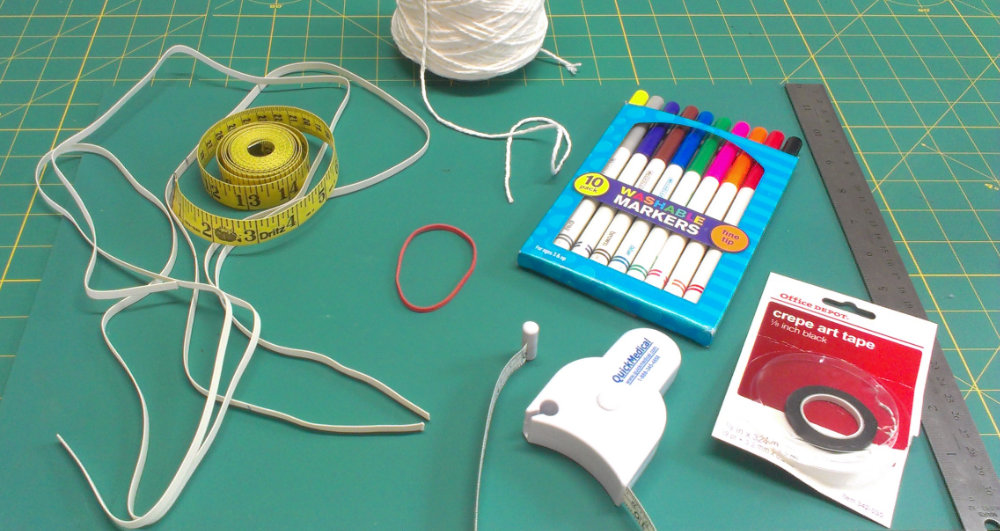
Measuring Supplies
There are only minimal supplies needed to take measurements. You will need a flexible measuring tape, like those sold for sewing, and a regular ruler. You will also need a thin chain or just a piece of heavy string for the neck.
You'll want to use pieces of elastic that are no wider than 1/4” / 6mm. A couple yards of a cheap elastic is fine and even scraps will work.
Find a skin safe marking tool, like eyeliner or a washable pen. You’ll use this to make marks directly on the skin. Permanent Sharpie is probably not a great idea.😉
When choosing elastic, use a color that contrasts with the skin/clothing of the person being measured. This will stand out much better in mirror checks or photos, if you need them.
Preparations & Posture
Measuring Yourself
Measuring yourself is hard. It can be done, but the accuracy will not be ideal. A friend, significant other or even a child can be very helpful. An extra set of hands can make all the difference.
What to Wear
You need to wear only the basic essentials to get measured. Wear your usual undergarments that you wear everyday under your clothes. Briefs are good, boxers are not because they are too fluffy and interfere with accurate measuring. Find something more conforming, but not tight.
Measuring nude is not the best solution. Some measurements run through the crotch area and that would be a bit awkward. If you normally wear a bra, you should have one on for measuring.
If you're not comfortable standing in your underwear while being measured, you can wear some clothing. A full leotard would be very good, if you have it. Search your wardrobe for items that are thin and conforming like knits. A fitted t-shirt and leggings would be great. Just make sure they don’t distort anything.
Posture
Ask the person to stand with their weight evenly distributed on both feet. When being measured, people have a tendency to lift their shoulders in tension or straighten up their posture. Keep the person relaxed and comfortable. People often hold their breath or change their posture when spoken to during a measurement. To encourage natural breathing speak casually to ensure they are in a relaxed state. You might want to warm the room up for them because they won’t be wearing a lot of clothes.
Never talk about the measurement you are taking or make comparisons. Being measured can be stressful for people. Talk about something else entirely and keep the mood light.
The model should wear the types of shoes (or heel height) they intend to wear with the final garments. Heel height can change pelvic tilt, posture, and vertical measurements.
Our sizes fluctuate throughout the day. Keep this in mind as you measure. A big lunch is going to expand that waist measurement! Remember that we are organic and measuring is never going to be an exact science. Do the best you can.
Practice
Taking accurate measurements takes a bit of practice. Give it a try on an inanimate object, like a dress form or doll before you take them on a human. It is much easier to measure something that doesn't move or fluctuate in size. You can take your time and get the hang of it.
Some books would have you believe that you are incapable of taking good measurements. I don’t agree with this. I can get a better fit with measurements taken slightly off than a standard set from a table.
Measuring Terms
- Circumference Measurement: This means that you will wrap the measuring tape around a body part. Such as measuring all the way around the waist. A circumference measuring tape makes quick work of this, if you have one.
- Conforming Measurement: A conforming measurement means that you will hold the tape against the body and conform it to the body as you measure.
- Straight Measurement: A straight measurement means that you will measure from one point to another in a straight line. You can use a ruler, yardstick or rigid measuring tape for these measurements because you don't want it to conform to the body.
- Parallel to the Floor: When the instructions say parallel to the floor, that means that if you measured from the elastic in the front to the floor and the elastic in the back to the floor the measurements would be the same. The elastic is level and not tipped.
Precision Split Measurements
Some measurements are very precise actually splitting the body at the side. Examples would be Front Waist and Back Waist. This may seem tedious, but there is a good reason for it. Simply dividing a total circumference in half assumes that your front and back are identical, which is rarely true. Posture, bust/chest depth, and seat shape mean that most people need more (or less) fabric across the front than the back. Taking split measurements ensures your side seams hang straight along the body's natural lateral line, prevents twisting, and gives you the exact front-to-back proportion needed to draft accurate fit and dart shaping.
Also, pattern drafting uses the difference between front and back widths to determine dart sizes and shaping angles. Simply dividing the total circumference in half hides this difference, forcing you to guess how much volume to draft for the front vs. the back.
The most accurate way to take a precise split measurement is to mark your horizontal elastic (waist, hips, etc) at where the side seam is on each side. This seam would align vertically from the center of the armpit matching the body’s natural lateral halfway point.
Then measure either the front or back from side to side, whichever is easier. Then take the full circumference measurement. Subtract your front/back measurement and this gives you the other one. This guarantees that your two values will add up to the total, even if one of them is off a bit.
Establishing Starting Points
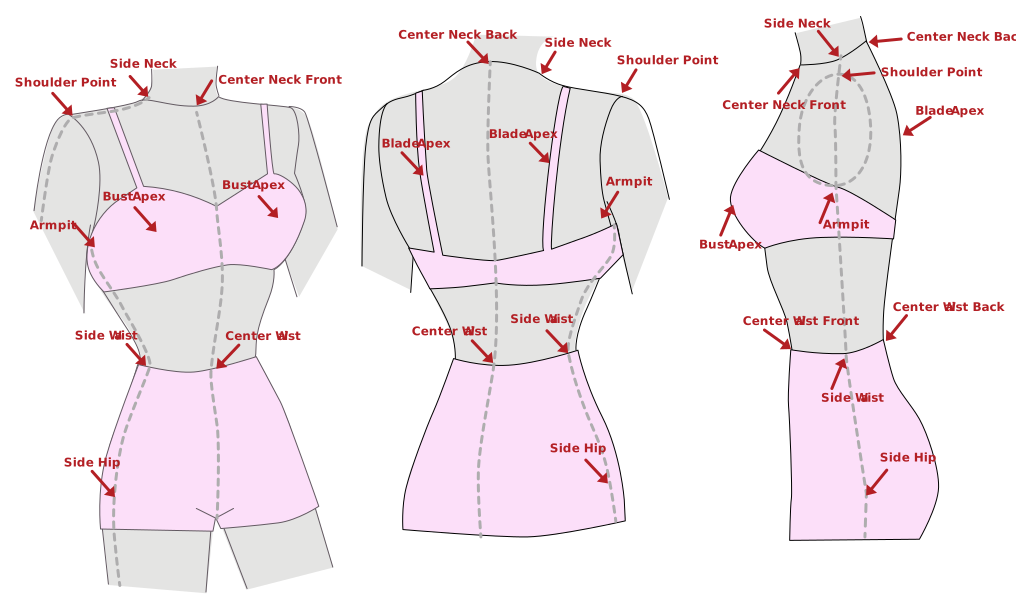
Throughout this section I will refer to the person being measured as the model. I refer to curvy builds with breasts as type X and straight builds without breasts as type Y.
Perhaps the greatest challenge when measuring is finding points on the body and consistently using the same ones. There are many measurements that refer back to specific lines or points. It will save you a ton of time to keep these lines and points consistent as references.
When you use elastic, you want it snug so it doesn't move during the entire measurement process. However, you don't want it to deform the body underneath.
Below are some helpful tips on taking the best measurements.
Waist
First, we're going to find the natural waist. It is the most important reference point for many measurements. Take a piece of elastic and pin or clip it around the waist so that it is snug enough not to slide. Have the model do a few side bends so the elastic will move to the position on its own. Make sure they bend directly to the side, not forward or backward. The elastic will not be parallel to the floor, and that's okay for this measurement.
The natural waist is going to seem high, particularly on the Y body type. A good point of reference is that the natural waist is close to where the elbow is when the arms are down. Don’t put the elastic where you usually wear your pants or skirts. Most drafting instructions will use this natural waist and will have specific instructions for low waist/waistband drafting.
The waist elastic will stay in place throughout the measurement process. It is used extensively for reference.
Cervical Bone - Back Neck
There is a very prominent cervical bone at the top of the spine. This location is very important and used for many measurements. You might want to make a mark there for reference.
Neck
Next, put a chain or string around the neck. You don't want it too snug or hanging way down. You want the chain to lay where a collar would meet the neckline of a shirt. This is quite high on the neck. The chain/string should be in the pit of throat at center front and touch the cervical back.
Shoulder Points
Now you need to find the shoulder point on each side. Use your finger and press down on the top of the arm at the shoulder until you can feel that little bone that protrudes. As the model moves the arm up and down, the bone is stationary and sits just at the hinging area.
It is roughly in line vertically to the arm pit. This point is very important, so please take the time to find it properly. Mark it with an X on both sides of the model at this point.
Bust
Place a piece of elastic around the bust. If this model doesn't have breasts, type Y, this will be the widest area of the chest. The elastic should be parallel to the floor.
Armpit
The armpits are located about 1/2" / 12mm below the actual armpit of the model. This is where the lowest part of a fitted armhole would be. You might find it easiest to run elastic around the body in the armpits and use that as the reference line. Keep it as parallel as possible, understanding that it may rise in front with larger breasts.
Hips
Place a piece of elastic around the hips at the widest point. You can't always tell where this is in the front because the butt will make a difference. Keep the elastic parallel to the floor.
Marking these lines and points before measuring will save you a lot of time and trouble. It makes the process much easier for your model, too.
Measurement Definitions & Instructions
The PatternMaker Pro website includes a free resource called the Measurement Guide. This shows many common measurements with images of where they are on the body and a definition of how to take them. Also included is a Pattern Diagram that shows a draft and where the measurement is used.